Event Handling and User Interaction
Subject: Mobile Application Development (VU-CSS 223)Event handling is about making your app interactive. Widgets like buttons, sliders, and text inputs don’t just sit there, they respond to user actions (clicks, touches, typing, gestures). Kivy provides a flexible way to bind these events to functions.
Core Concepts
Binding Events: use .bind() to connect a widget’s event to a function. For example, button.bind(on_press=self.callback_function)
Common Events
- on_press when a button is pressed
- on_release when a button is released
- on_text when text in a TextInput changes
- on_value when a slider’s value changes
Pracical Example
Step 1: Set Up the Project: create a file called event_handling_app.py. This will be your main app file.
from kivy.app import App
from kivy.uix.boxlayout import BoxLayout
from kivy.uix.label import Label
from kivy.uix.button import Button
from kivy.uix.textinput import TextInput
from kivy.uix.popup import Popup
Here we import the widgets we’ll need:
- BoxLayout: to arrange widgets vertically.
- Label: to display text.
- Button: for user interaction.
- TextInput: to collect the user’s name.
- Popup: to show a greeting message.
Step 2: Build the Layout We’ll create a vertical layout with:
- A welcome label.
- A text box for the user’s name.
- A button to trigger the event.
class EventApp(App):
    def build(self):
        layout = BoxLayout(orientation='vertical', spacing=10, padding=20)

        # Welcome label
        layout.add_widget(Label(text="Welcome to my app", font_size=30))

        # TextInput for name
        self.name_input = TextInput(hint_text="Enter your name", multiline=False)
        layout.add_widget(self.name_input)

        # Button
        btn = Button(text="Continue")
        btn.bind(on_press=self.show_popup)  # Event binding
        layout.add_widget(btn)

        return layout
Step 3: Handle the Button Event when the button is clicked, we’ll grab the text from the TextInput and show it in a popup.
    def show_popup(self, instance):
        name = self.name_input.text.strip()
        if name == "":
            message = "Please enter your name!"
        else:
            message = f"Welcome {name}"

        popup = Popup(title="Greeting",
                      content=Label(text=message),
                      size_hint=(0.6, 0.4))
        popup.open()
Step 4: Run the App finally, add:
EventApp().run()Full code
from kivy.app import App
from kivy.uix.boxlayout import BoxLayout
from kivy.uix.label import Label
from kivy.uix.button import Button
from kivy.uix.textinput import TextInput
from kivy.uix.popup import Popup

class LayoutBoxApp(App):
    def build(self):
        # Main layout
        self.layout = BoxLayout(orientation='vertical', spacing=10, padding=20)

        # Labels
        self.layout.add_widget(Label(text="Welcome to my app", font_size=40, color=(1, 0, 0, 1)))
        self.layout.add_widget(Label(text="Built with Kivy", font_size=20))

        # TextInput for user name
        self.name_input = TextInput(hint_text="Enter your name", multiline=False)
        self.layout.add_widget(self.name_input)

        # Button
        btn = Button(text="Continue")
        btn.bind(on_press=self.show_popup)
        self.layout.add_widget(btn)

        return self.layout

    def show_popup(self, instance):
        # Get the name from TextInput
        name = self.name_input.text.strip()
        if name == "":
            message = "Please enter your name!"
        else:
            message = f"Welcome {name}"

        # Create popup
        popup = Popup(title="Greeting",
                      content=Label(text=message),
                      size_hint=(0.6, 0.4))
        popup.open()

LayoutBoxApp().run()
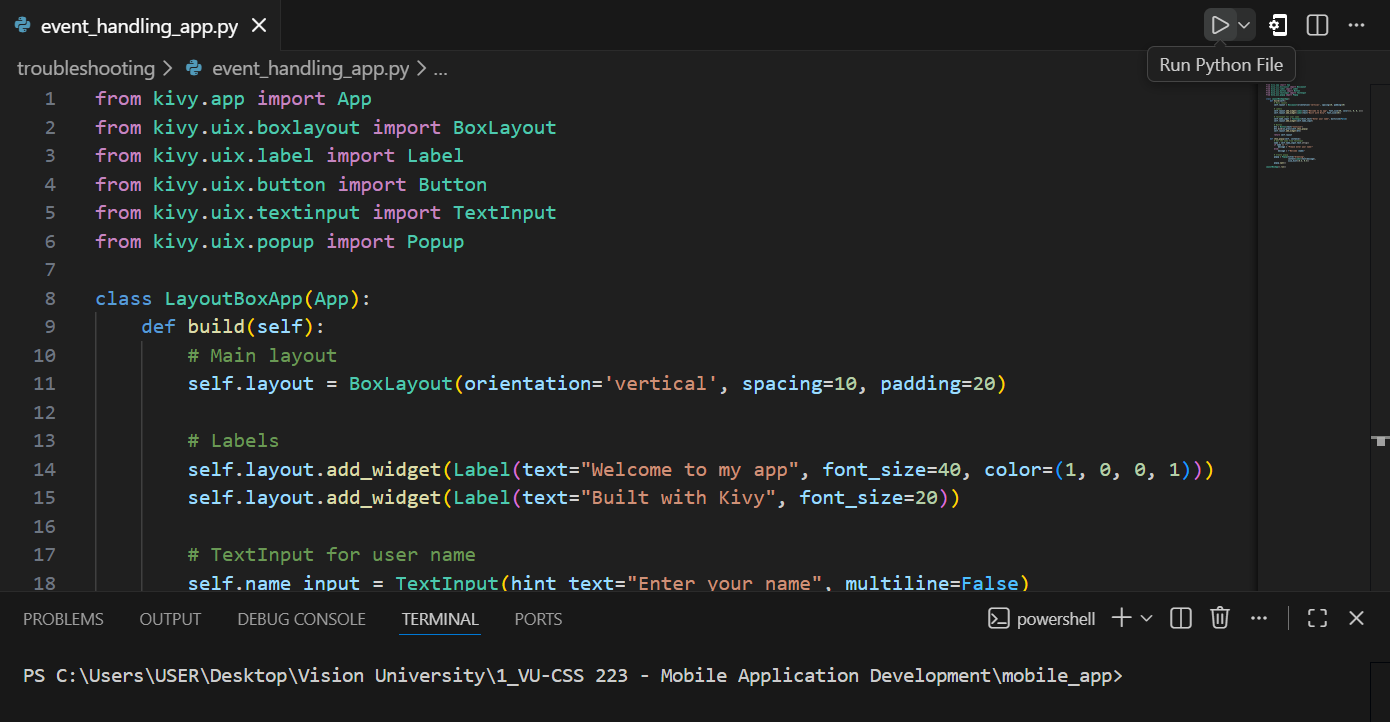
Code in VS Code, click the "Run" button to run python code
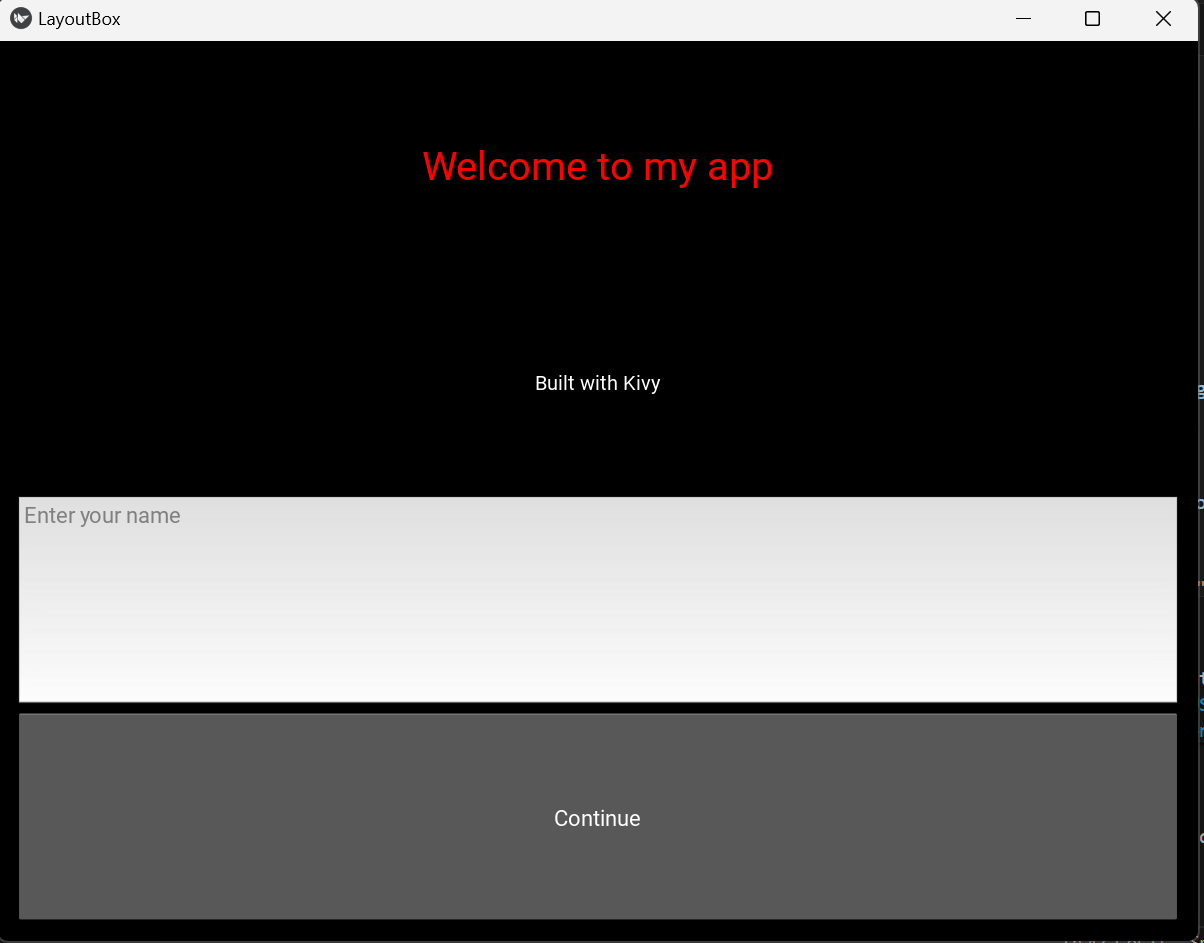
The kivy app
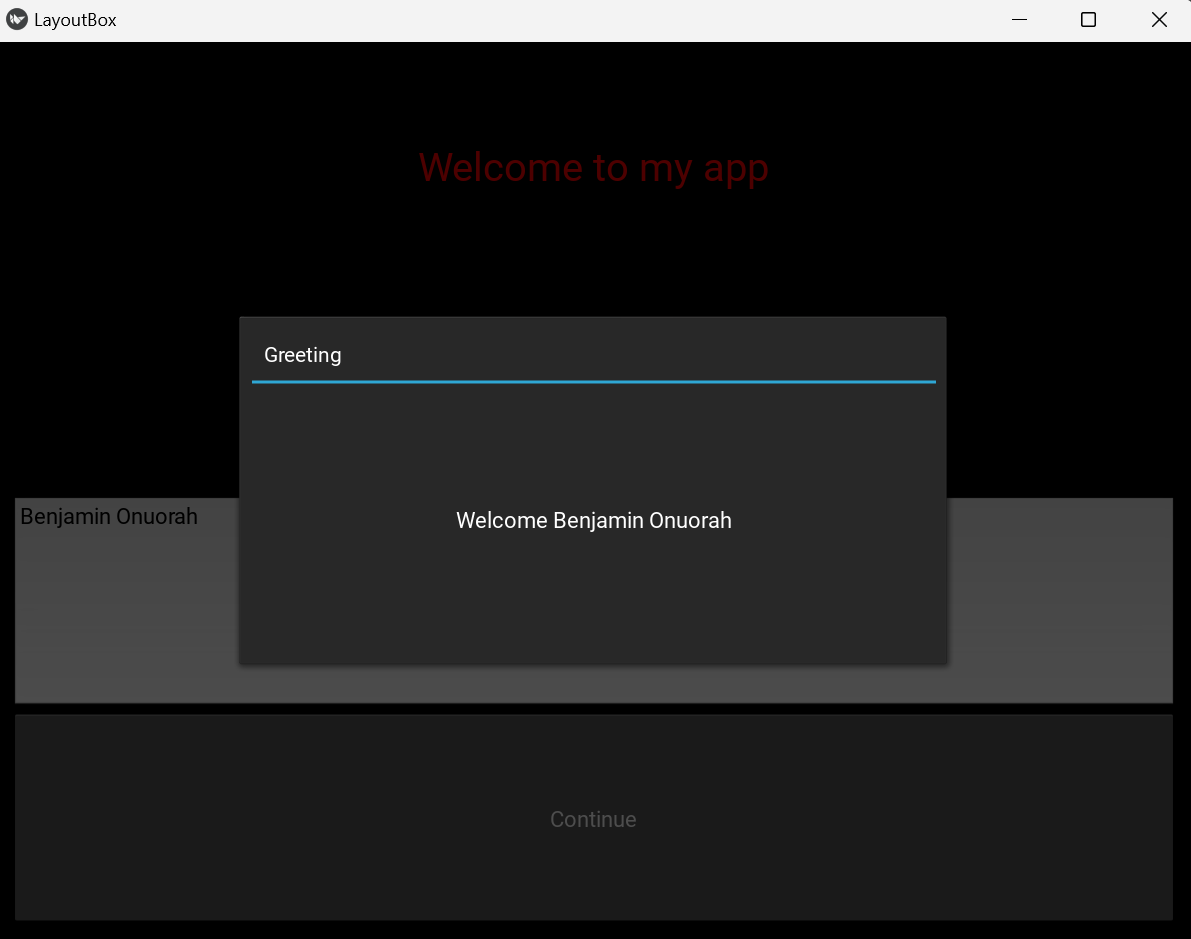
Enter your name and click the "Continue" button
By: Vision University
Comments
No Comment yet!
Login to comment or ask question on this topic
Previous Topic
- 1 Introduction to Mobile Application Development
- 2 Understanding the Kivy Framework
- 3 Kivy Widget: Label, Button
- 4 Introducing the KV Language
- 5 Layouts in Kivy
- 6 Event Handling and User Interaction