Layouts in Kivy
Subject: Mobile Application Development (VU-CSS 223)In Kivy, layouts are containers that arrange widgets like buttons, labels, and text inputs. Since widgets don’t position themselves, layouts decide where each widget goes and how much space it takes. They make apps flexible, so the interface adapts to different screen sizes on phones, tablets, and computers. Kivy offers several layouts such as BoxLayout for stacking widgets, GridLayout for tables, and FloatLayout for free positioning. Developers can even nest layouts to build complex designs. Learning layouts is essential for creating clean, responsive, and well-organized user interfaces.
Layout: Example 1
#layout_box.py
from kivy.app import App
from kivy.uix.boxlayout import BoxLayout
from kivy.uix.label import Label
from kivy.uix.button import Button

class LayoutBoxApp(App):
    def build(self):
        layout = BoxLayout(orientation='vertical')
        layout.add_widget(Label( text="Welcome to my app", font_size=40, color=(1, 0, 0, 1) ))
        layout.add_widget(Label( text="Built with Kivy", font_size=20 ))
        layout.add_widget(Button( text="Continue" ))
        return layout

LayoutBoxApp().run()
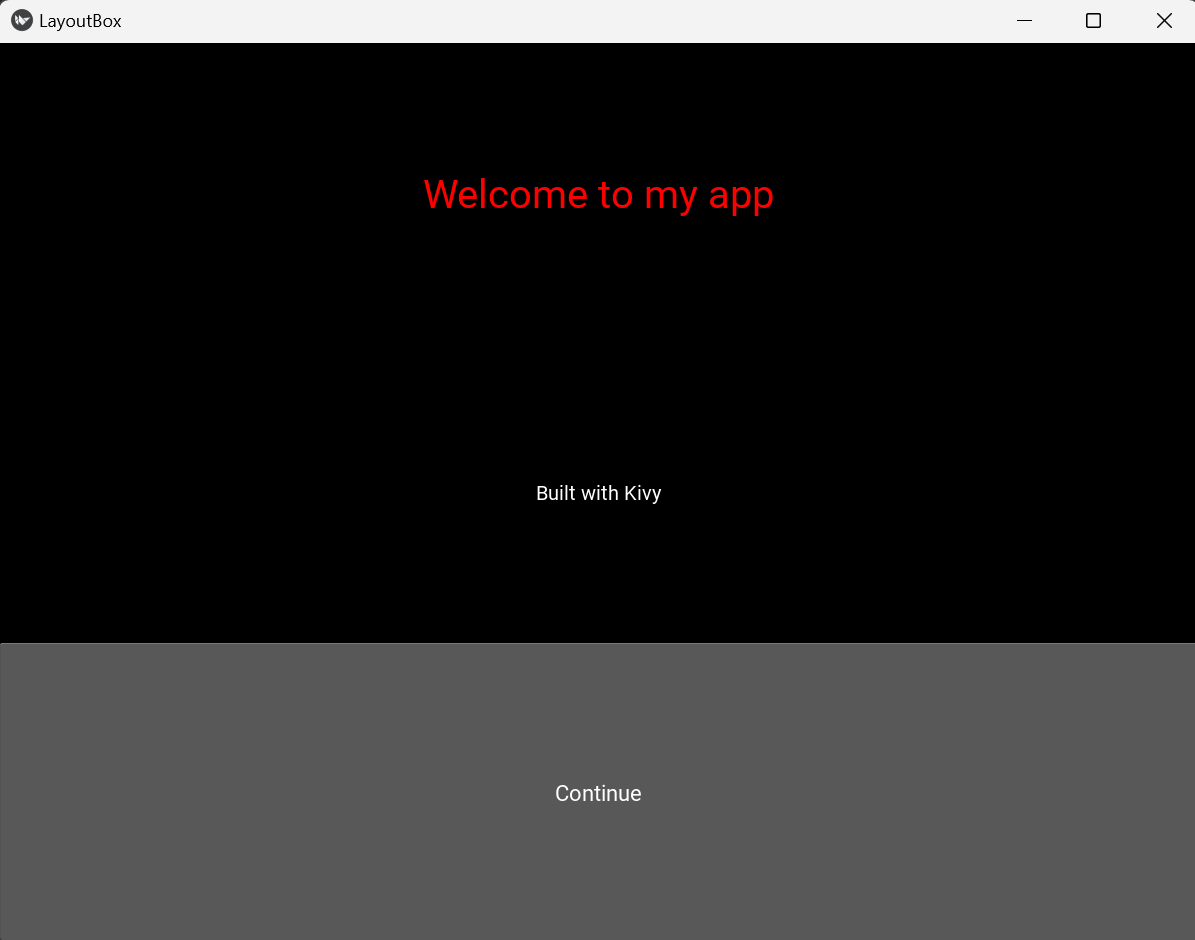
This program creates a very simple Kivy application with a BoxLayout and orientation='vertical'. The layout acts like a container that stacks its child widgets from top to bottom. Inside it, the app places two text labels and one button: the first label shows a large red message saying “Welcome to my app,” the second label displays smaller text saying “Built with Kivy,” and the button at the bottom is labeled “Continue.”
When the app runs, Kivy builds this layout and displays it in a window. The App class manages the application lifecycle, while the build method defines what the interface looks like. In short, the code demonstrates how to combine labels and a button inside a vertical box layout to create a clean, organized user interface.
BoxLayout: Example 2
To use the kv file with the code in example 1; we will modify the code by removing all the UI from the Python file
#layout_box.py
from kivy.app import App

class LayoutBoxApp(App):
    pass

LayoutBoxApp().run()
Kivy File layoutboxapp.kv
#:kivy 2.0.0
#layoutboxapp.kv

BoxLayout:
    orientation: "vertical"
    padding: 20
    spacing: 15

    Label:
        text: "Welcome to my app"
        font_size: 40
        color: 1, 0, 0, 1

    Label:
        text: "Built with Kivy"
        font_size: 20

    Button:
        text: "Continue"
GridLayout: Example 3
GridLayout in Kivy arranges widgets in a table-like structure with rows and columns. You specify either the number of rows or cols, and Kivy automatically organizes the widgets accordingly.
Here’s a simple Python example using GridLayout:
from kivy.app import App
from kivy.uix.gridlayout import GridLayout
from kivy.uix.button import Button

class MyApp(App):
    def build(self):
        layout = GridLayout(cols=2, padding=10, spacing=10)

        layout.add_widget(Button(text="Button 1"))
        layout.add_widget(Button(text="Button 2"))
        layout.add_widget(Button(text="Button 3"))
        layout.add_widget(Button(text="Button 4"))

        return layout

MyApp().run()
Explanation
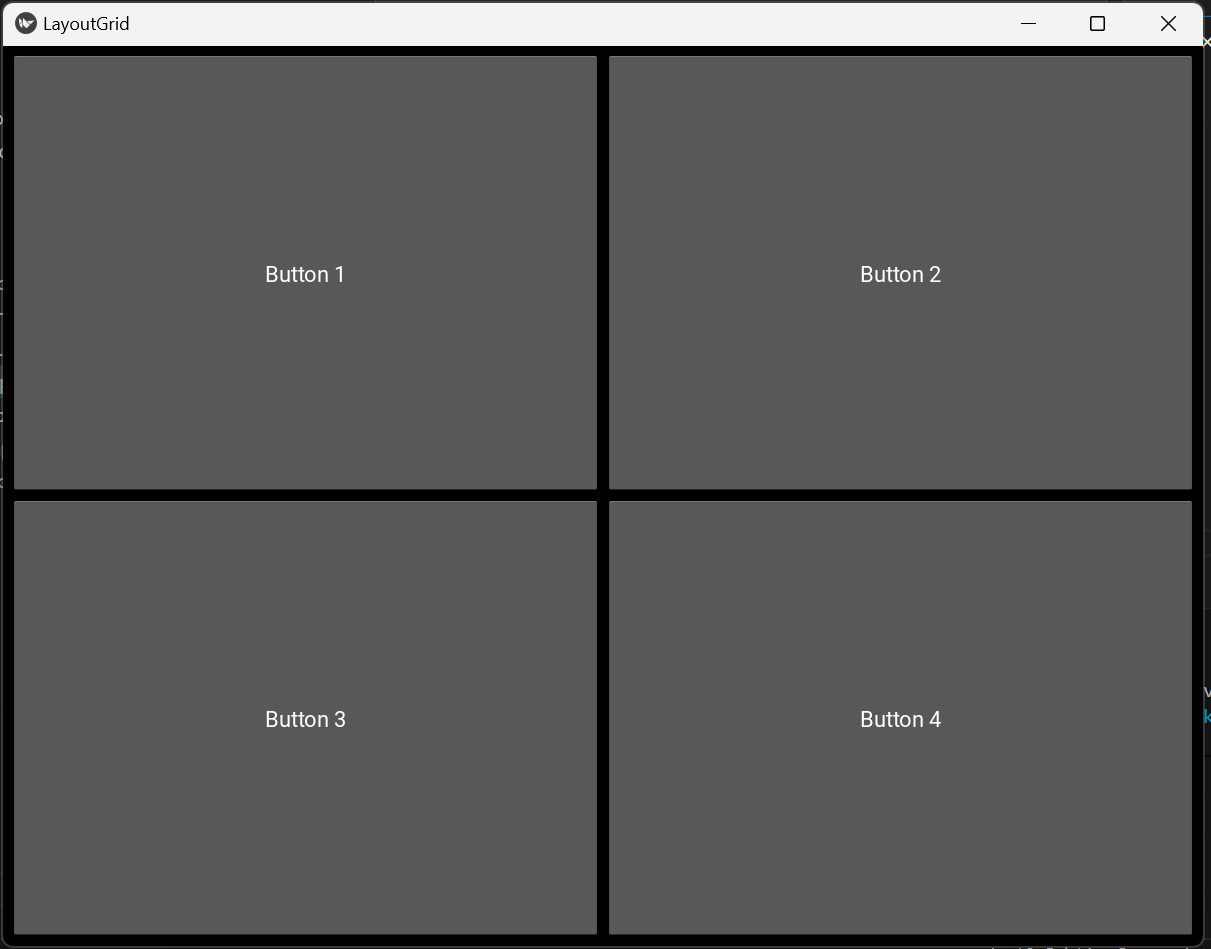
- This GridLayout creates a grid with 2 columns.
- That is widgets are added left-to-right, top-to-bottom.
- Padding adds space around the layout, while Spacing adds space between widgets.
- In this example, 4 buttons are arranged in a 2×2 grid.
To use kivy language for the UI, simply remove all the widgets Python code as we did earlier, it should look like this
from kivy.app import App

class LayoutGridApp(App):
    pass

LayoutGridApp().run()
and now it's .kv file
Kivy File layoutgridapp.kv
#:kivy 2.0.0
#layoutgridapp.kv

GridLayout:
    cols: 2
    padding: 10
    spacing: 10

    Button:
        text: "Button 1"
    Button:
        text: "Button 2"
    Button:
        text: "Button 3"
    Button:
        text: "Button 4"
FloatLayout: Example 4
FloatLayout in Kivy is a layout that lets you place widgets at absolute positions on the screen using coordinates. Unlike BoxLayout or GridLayout (which arrange widgets automatically in rows, columns, or stacks), FloatLayout gives you full control over where each widget goes.
Each widget inside a FloatLayout uses two important properties:
1. pos_hint: positions the widget relative to the layout (values between 0 and 1, like percentages).
2. size_hint: controls how much space the widget takes relative to the layout (also between 0 and 1).
For example, you can put a button in the bottom-right corner by setting pos_hint: {"x": 0.8, "y": 0} and size_hint: (0.2, 0.1). This makes FloatLayout useful when you want precise placement, like designing custom screens, overlays, or game interfaces.
from kivy.app import App
from kivy.uix.floatlayout import FloatLayout
from kivy.uix.label import Label
from kivy.uix.button import Button

class LayoutFloatApp(App):
    def build(self):
        layout = FloatLayout()


        # Button in top-left corner
        layout.add_widget(Label(
            text="Vision University",
            size_hint=(0.3, 0.15),
            pos_hint={"x": 0, "y": 0.85}
        ))

        # Button in bottom-right corner
        layout.add_widget(Button(
            text="Click Me",
            size_hint=(0.2, 0.1),
            pos_hint={"x": 0.8, "y": 0}
        ))

        return layout

LayoutFloatApp().run()
Its .kv file
layoutfloatapp.kv
#:kivy 2.0.0
FloatLayout:
Label:
text: "Vision University"
size_hint: 0.3, 0.15
pos_hint: {"x": 0, "y": 0.85}
Button:
text: "Click Me"
size_hint: 0.2, 0.1
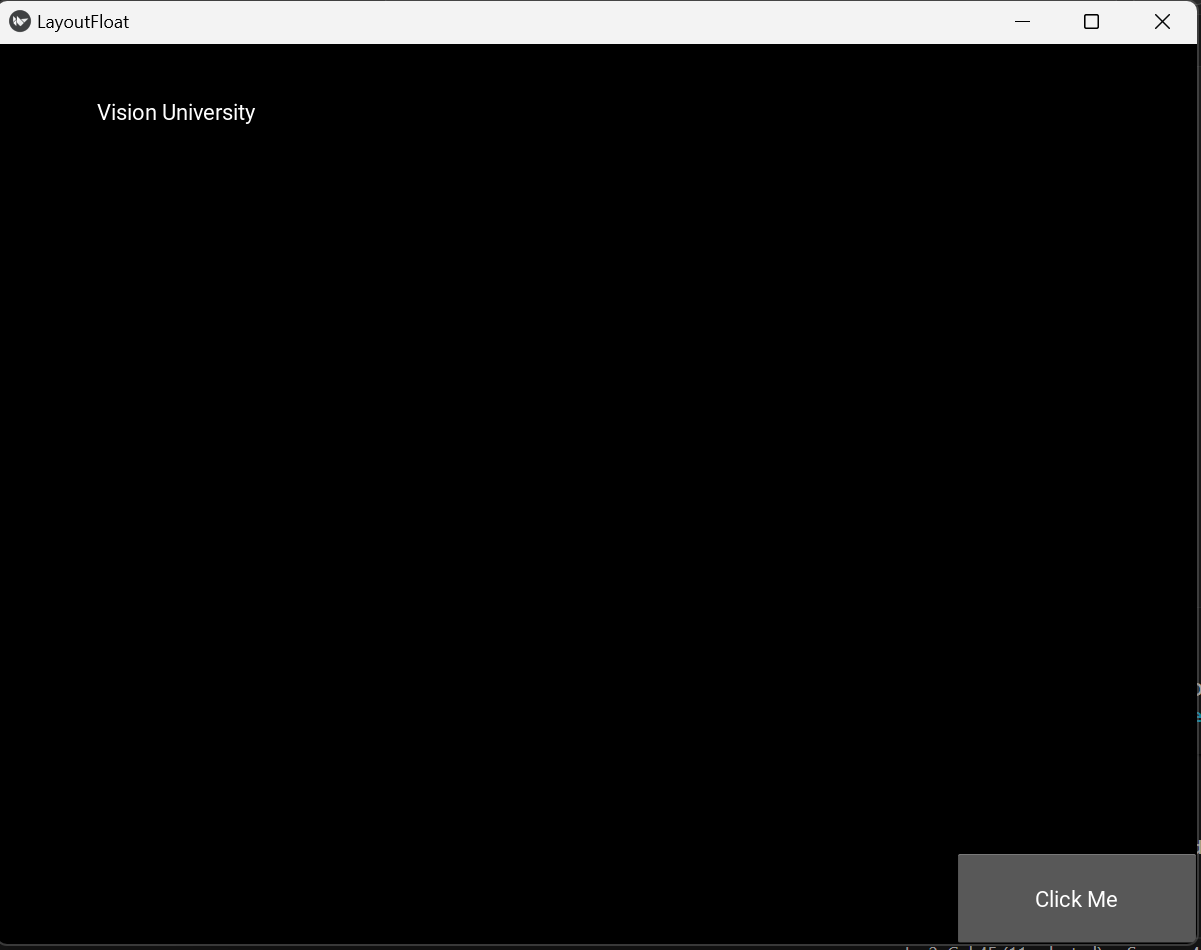
pos_hint: {"x": 0.8, "y": 0}FloatLayout: the root container, allows free positioning of widgets.
Label: displays "Vision University" at the top-left corner using pos_hint={"x":0, "y":0.85}.
Button: shows "Click Me" at the bottom-right corner using pos_hint={"x":0.8, "y":0}.
size_hint: controls how much space each widget takes relative to the layout.
Layout Box
Float Layout
Grid Layout
By: Vision University
Comments
No Comment yet!
Login to comment or ask question on this topic
Previous Topic Next Topic